


Микроплавление деталей, напечатанных на 3D-принтере, с выжигаемыми смолами
Микроплавление или литье по выплавляемым моделям является одним из наиболее широко используемых методов производства в ювелирной промышленности и является старейшим из известных процессов литья.
Литье позволяет изготавливать металлические копии с помощью формы, которая изготавливается из прототипа, традиционно моделируемого из воска. В этом случае вместо восковых моделей используются 3D-печатные детали с выжигаемыми смолами.
Ювелирные изделия могут быть изготовлены из различных металлов, включая золото, платину, серебро и латунь , используя процесс литья. Ниже вы можете увидеть процесс микроплавления для ювелирных изделий из 3D-печатных деталей с выжигаемыми смолами:
1- 3D-печать детали
На основе проектов, созданных с помощью программного обеспечения САПР. желаемые модели должны быть напечатаны на 3D-принтере. В настоящее время существует большое количество прокаливаемых смол от разных производителей. Использование того или иного материала зависит от используемого 3D-принтера и требуемых характеристик деталей.
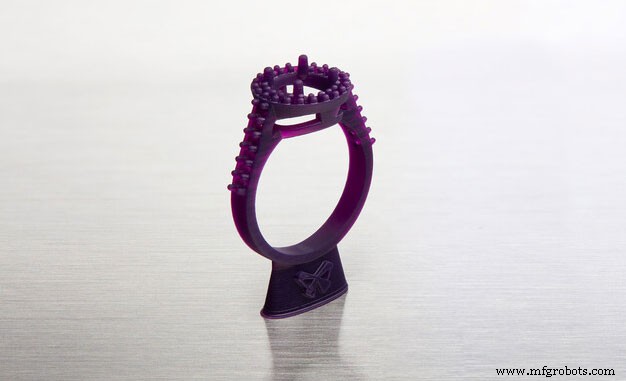
Изображение 1. Кольцо, напечатанное на 3D-принтере из выжигаемой смолы FormLabs. Источник:FormLabs.
Одним из самых популярных 3D-принтеров для 3D-печати в ювелирном секторе является Form3 от известного производителя FormLabs. Этот 3D-принтер не требует передовых технических знаний, поэтому его можно без труда использовать. . 3D-принтер Form3 ограничивает свое использование, поддерживая только материалы, разработанные производителем. Это может быть преимуществом, так как настройка не требуется, а параметры конфигурации и изменяемые значения сведены к минимуму, при этом необходимо выбрать только тип материала и несколько основных параметров. Это сводит погрешность к минимуму.
В следующей таблице показаны некоторые из наиболее популярных выжигаемых смол и их совместимость с 3D-принтерами:
| Смола | Производитель | Технологии | Совместимость |
|---|---|---|---|
| Литьевой воск | ФормЛабс | Соглашение об уровне обслуживания | Форма 2, Форма 3, Форма 3L, Форма3+ |
| литьевой воск 40 | ФормЛабс | Соглашение об уровне обслуживания | Форма 2, Форма 3, Форма 3L, Форма3+ |
| zWax Amber | УниЗ | ЖК-дисплей | Слэш, Слэш 2, Слэш 2 Плюс, Слэш 2 Про |
| zWax фиолетовый | УниЗ | ЖК-дисплей | Slash, Slash 2, Slash 2 Plus, Slash 2 Pro |
| Bluecast original | Zortrax | LCD | UniZ, WANHAO, zortrax, ANYCUBIC, ASIGA, B9 Creator, FLASH FORGE Moon Ray, Prusa. |
| Bluecast X5 | Zortrax | LCD | UniZ, WANHAO, zortrax, ANYCUBIC, ASIGA, B9 Creator, FLASH FORGE Moon Ray, Prusa. |
| Bluecast X10 | Zortrax | LCD | UniZ, WANHAO, zortrax, ANYCUBIC, ASIGA, B9 Creator, FLASH FORGE Moon Ray, Prusa. |
| Dental Cast | Harz Labs | LCD | Formlabs, PEOPOLY, UniZ, WANHAO, zortrax, ANYCUBIC, ASIGA, B9 Creator, FLASH FORGE Moon Ray, Prusa. |
Table 1:Burn-out resins and compatibility. Источник:Filament2print.
Each material has different properties and requires different parameters. However, they all have a common characteristic:they have been developed to replace wax parts in the microfusion process, with a composition that achieves castings free of residues that could affect the final result of the parts.
Once the parts have been printed, they must be cured if the material requires it. This depends on the composition of the resin and the manufacturer's advice should always be followed to achieve an optimum result.
2- Wax tree
Once the parts are cured (in cases where this step is required), the removal of the backing can be carried out, always with great care. Sandpaper (400 grit or higher) or even a rotary tool with a polishing attachment can be used to achieve total removal of the support and a perfect finish.
To create the wax tree, a wax base is taken and attached to a rubber cover of the sprue. Small cylindrical wax rods are welded to the wax base using a heat tool. The 3D printed parts are welded to the other end of the bars.
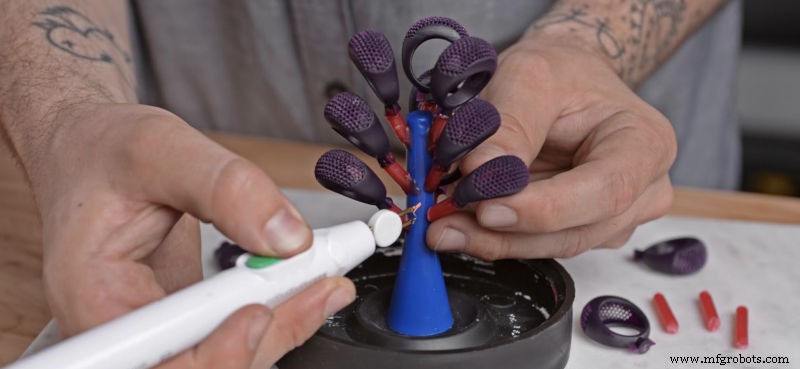
Image 2:Casting wax tree. Source:FormLabs.
This process is similar to that carried out in microfusion when casting traditionally carved wax pieces.
3- Mould preparation
The wax tree with the 3D printed parts in burn-out resin is to be placed inside a refractory steel cylinder, which is to be fitted into the rubber cylinder cover. In case the refractory steel cylinder has holes, these should be covered by wrapping the cylinder in adhesive tape.
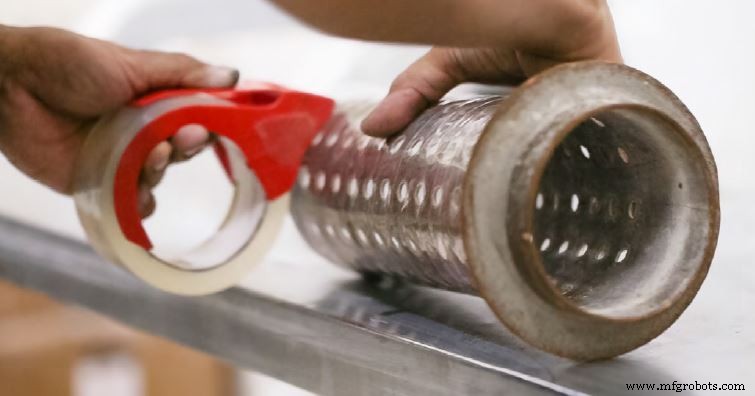
Image 3:Refractory steel cylinder shell. Source:Formlabs.
The casting must then be poured slowly, always from the side of the cylinder to avoid damaging the tree with the parts 3D printed with calcineable resin.
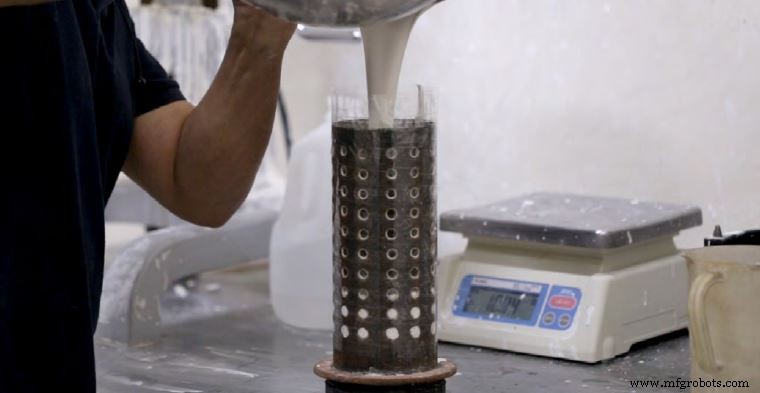
Image 4:Pouring of the casting into a refractory steel cylinder. Source:Formlabs.
When pouring the casting, it is possible that small air pockets may remain which can affect the quality of the final parts. For this reason, it is very important to carry out the degassing process in a vacuum chamber.
4- Burnout
The cylinder is placed in the oven following the time and temperature instructions recommended by the manufacturer. During this time, the wax will burn out without leaving residues, leaving the mould ready.
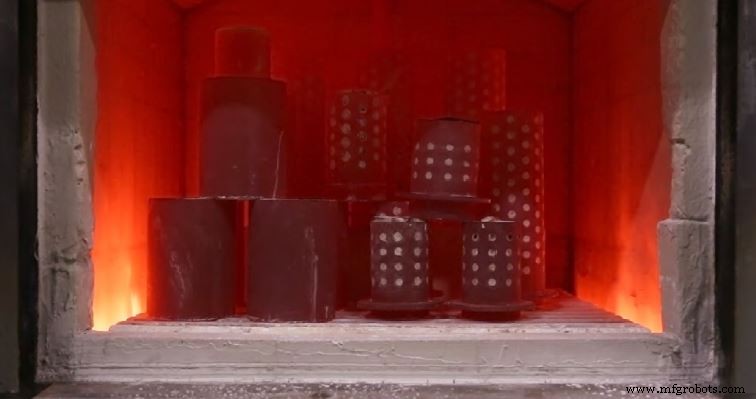
Image 5:Burnout process. Source:Formlabs.
The desired metal must then be poured into the mould to produce the final parts.
5- Washing and polishing
After casting, the mould is carefully removed from the furnace and immersed in water using tongs. During this process, the casting will melt, leaving the metal parts visible. Once washed, the metal parts are separated from the tree, polished and polished until the desired finish is achieved.
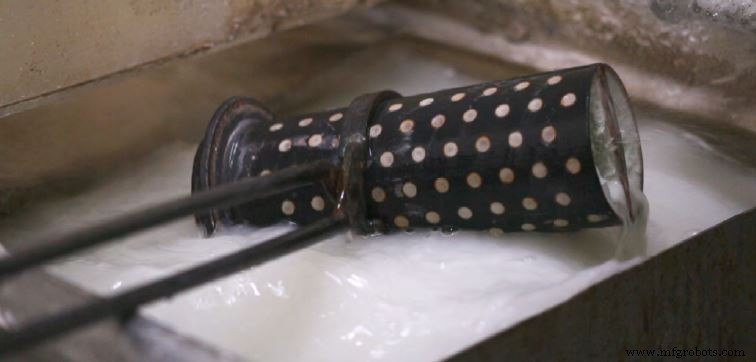
Image 6:Washing process. Source:Formlabs.
Once washed, the metal parts are separated from the tree, polished and polished to the desired finish.
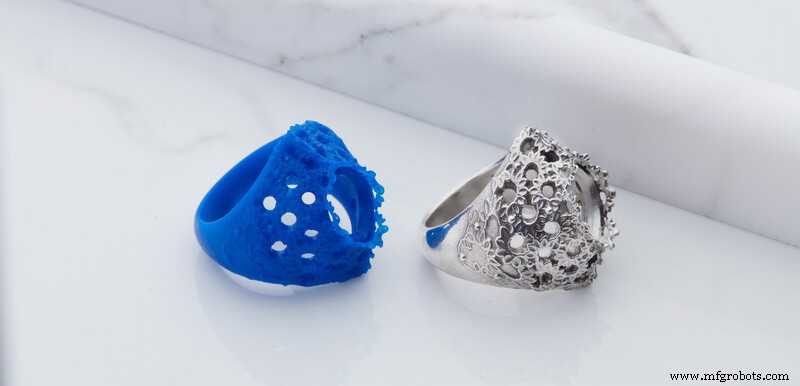
Image 7:3D printed ring with burn-out resin and silver ring after the microfusion process. Source:Formlabs.
The use of castable resins in the jewellery sector offers numerous advantages . Among others, it allows you to 3D print as many models as you want, quickly and with extreme precision . This results in a significant reduction in costs and production times.
3D печать
- Сварка и склейка пластиковых деталей, напечатанных на 3D-принтере
- Должны ли вы закончить свои 3D-печатные детали самостоятельно?
- Обработка 3D-печатных деталей ... мелками?
- Введение в 3D-печать с избирательным лазерным спеканием
- 3D-печать со смолами:введение
- Как сделать металлические детали легче с помощью 3D-печати из металла
- Печать предохранителя 1 с предохранителем 1
- Замена алюминиевых деталей углеродным волокном, напечатанным на 3D-принтере
- Лучший контроль качества с 3D-печатными деталями
- Закрепите себя функциональными деталями, напечатанными на 3D-принтере!